There has been an overwhelming number of queries regarding our process of making custom pins, so we decided to give you a detailed insight into the production process.
In this article, we will explain the entire process to make enamel pins from start to finish. We’ll discuss each of the major steps involved in manufacturing.
Alright, now let’s move on to the first phase in the production of lapel pins.
A Closer Look at the process to make enamel pins
Alright, let’s get the ball rolling on making enamel pins. We need to get a quote in order to start the process, which is how enamel pin production begins.
1. Send the artwork for a quote
To make enamel pins, find an enamel pin manufacturer firstly and provide them with your requirements like size, plating, quantity, and most important the design.
A lot of factors need to be confirmed in the process of designing a lapel pin – whether it should be hard enamel or soft enamel, plating requirements, Pantone color codes, and printing materials.
Moreover, the details like the back logo and post location need to be considered as well.
After clarification of requirements, an estimated cost will be sent to you and upon approval, the customer will make the payment.
After receiving the payment, an artwork proof was issued with all details included.
Once the customer approves the artwork, the production process starts.
2. Mold formation
Initially, the art is sent to a mold-engraving machine for mold formation.
Crafting a lapel pin requires up to 5- 6 different cutting tools to correctly engrave the front. This is an involved process to make enamel pins but when it’s done.
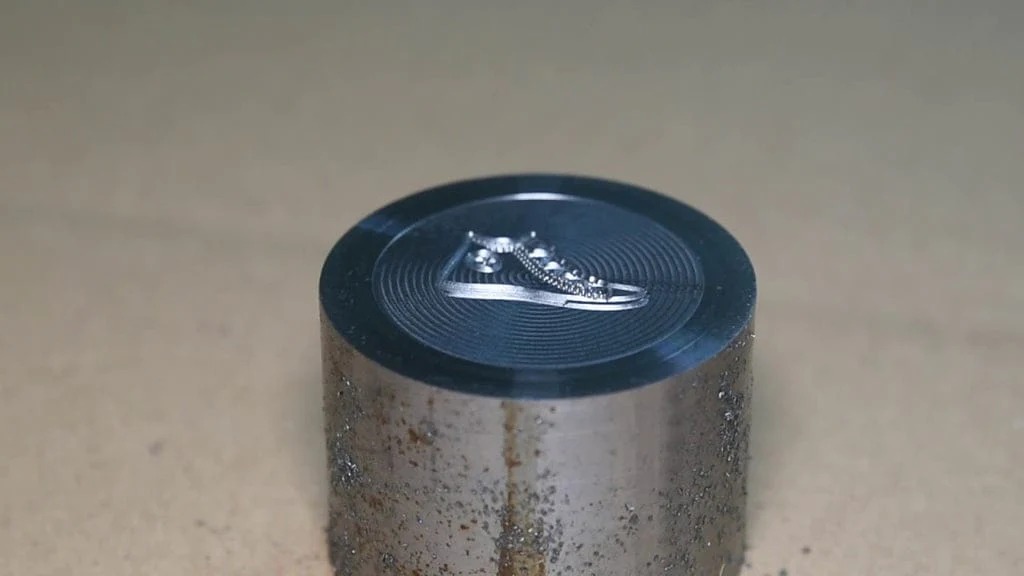
This pin design has an etched logo on the back, giving it an irregular shape that is best suited for zinc alloy material.
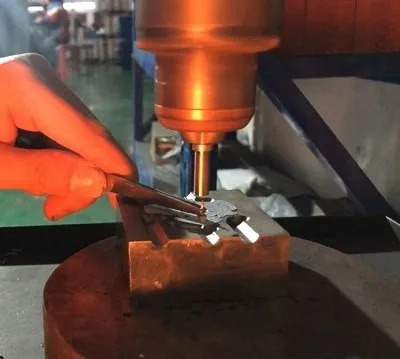
3. Die-casting
The pin-shaped forming process to make enamel pins for zinc alloy material pins requires the use of a zinc alloy die-casting machine. The front mold is located on one side, and the back mold is located on the other side, of the machine.
The process of forming a pin-like shape involves injecting a high-temperature metal alloy such as zinc alloy, into the gap between two molds and applying great pressure to it.
Upon cooling, the enamel pins are collected individually and isolated from one another.
4. Burring
Then get the edge of the pins cleaned and burr into a smooth surface. This is essential to make enamel pins.
5. Fix spur posts or needles
On a machine, the spurs or posts are mounted on the back of pins.
6. Colorizing, plating, printing
The next steps to make enamel pins involve colorizing, plating, and printing.
Soft enamel pins require plating, followed by colorizing and printing prior to packing.
During the hard enamel pin production process, you have to be very careful with colonizing.
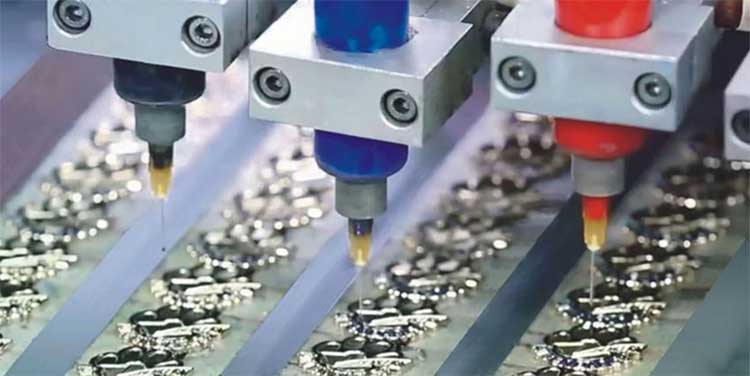
It’s important that only one color is put on at a time, otherwise, the colors will end up mixing and creating an undesired effect.
To ensure the colors are properly dried, pins go through a baking process. After applying one color, they are put into an oven for 2 hours. This is done for each additional color to ensure the paint is fully set.
The process of adding color to lapel pins is repeated until all the shades are added and dried. It is no surprise then that lapel pin cost increases depending on the number of colors used. The more colors, the more labor required, electricity consumed, etc., thus increasing the final cost.
After colors have been selected, they’re sent for a scouring process to remove impurities. Finally, the colors are polished on the polishing wheel to give them a shiny finish.
Once the pins have been polished, they are ready to be sent for plating.
Black nickel plating requires pins to be immersed in bowls of black nickel liquid. Through electrolysis, positive ions from the liquid are then attached to the metal surfaces of the lapel pins.
The two-color pin requires screen printing after plating. After completing these steps to make enamel pins above, the hard enamel pins are made and ready.
7. Quality inspection
After ensuring that all pins are in good condition, they are attached to clutches and each one is put into an OPP bag.
Once this is done, these bags are combined into one and wrapped with protective film. Finally, the package is put in a bag or box for delivery.
8. Deliver
After the delivery label is printed, the pins are ready for pick-up.
Via USPS or FedEx, these pins will be delivered to the customer soon.
Above is the hard enamel pins production process.
To make soft enamel pins, the step after post-fixing is plating.
In this process, black-dyed metal is needed. After plating, the colorizing step requires colors to be applied individually and dried separately.
For example, the pin needs glow in dark, it needs us to pour glow glitter onto the surface, clean and dry. And the glittered pins need to be coated with epoxy for them to last longer.
Soft enamel pins have an uneven surface, which is not suitable for screen printing. While the epoxy-coated surface is able to be screen printed.
After screen printing, each pin is inspected for quality assurance prior to being fitted with clutches. Finally, pins are packed for shipping and delivery in accordance with the same process described above.
Conclusion
The above steps to make enamel pins outline the process of manufacturing hard and soft enamel pins. We hope this article was informative and beneficial to you.
Once you experience the quality of the pins that Blythe provides, you will understand why we should be your go-to supplier for all your enamel pin needs.
I would be more than happy if you’d share my article with your friends.
Ready to make enamel pins with a pin factory, feel free to contact me for the quotation!
FAQs
What are enamel pins made of?
Enamel pins are usually made from either iron or copper metal, which is then coated with a layer of enamel.
What is the meaning of pin design?
A pin design is a comprehensive visual representation of the specific features a pin should have.
It usually contains details such as shape, size, color, and any additional graphics or text to be positioned on the pin.
How do I make enamel pins at home?
Anyone can make their own custom enamel pins from the comfort of their home.
To make enamel pins at home, all you need is some enamel paint, an iron-on backing, and a few other materials to get started.
Will my enamel pins be popular?
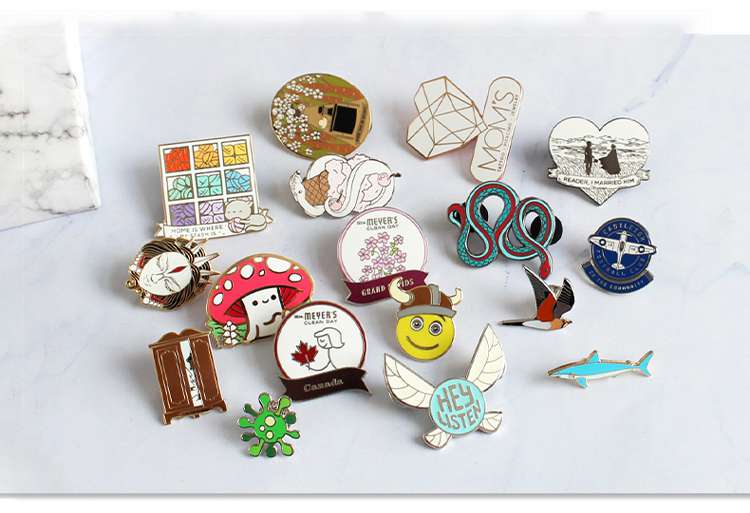
Pins have become an increasingly popular way to express style, share ideas and support causes. Pins come in a variety of designs, sizes, and materials, making them both stylish and functional.
What’s more, pins are affordable, easy to customize, and can be tailored to fit any personality or aesthetic.
As a result, pins offer a unique way for people to express themselves while providing them with the opportunity to connect with like-minded individuals.
In this case, learning how to make enamel pins above is necessary for you to make a profitable business.
What size are pin backing cards?
Pin backing cards are an increasingly popular way to display and store pins, badges, and buttons.
They come in a variety of sizes, ranging from small 2×3 inch cards to larger 6×8 inch cards.
Pin backing cards provide a secure way to store and protect your pins while also providing a professional-looking display option for your collection.
How do you make pins for backing cards?
Take care to ensure that the pins are sized properly on the backing card for an aesthetically pleasing design in the process to make enamel pins.
For instance, if you possess a 2-inch pin, you would want to avoid a card that is 2 inches by 2 inches.
The size of your card should be at least 3in. x 3in and the pins can be placed anywhere on it as per your request. If you possess design capabilities, you can indicate the desired puncture point for a nail on a card by marking it with an X.