Creating custom enamel pins is not just a process; it’s an adventure in creativity. Whether you’re designing for promotional purposes, commemorating a special event, or crafting merchandise for your brand, this guide will walk you through each step, ensuring your custom enamel pins are both stunning and memorable.
A Step-by-Step Guide to Creating Your Own Custom Enamel Pins
Step 1: Ideation and Conceptualization
Every great creation begins with an idea. Start by clarifying the purpose of your pin. Is it for brand promotion, a commemorative event, or just for fun? The concept should resonate with your target audience. Explore current market trends, research your competitors, and think about what makes your brand unique. This is your opportunity to brainstorm and sketch out ideas that capture the essence of your message.
Step 2: Designing Your Pin
Designing is where your concept comes to life. For this, professional design software like Adobe Illustrator or CorelDRAW is indispensable. These tools allow for precise control over lines, colors, and overall composition, ensuring your design is ready for production.
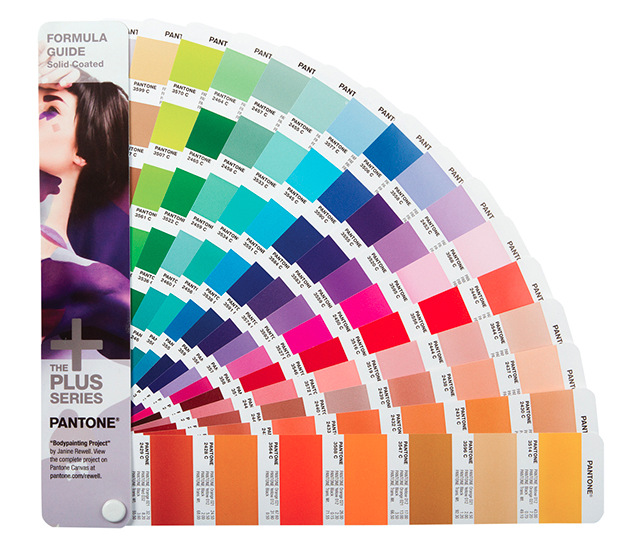
Pro Tip: Use the Pantone Matching System (PMS) for color accuracy. This ensures that the colors you envision are exactly what you’ll get in the final product. Keep your design bold and simple to avoid losing details during production.
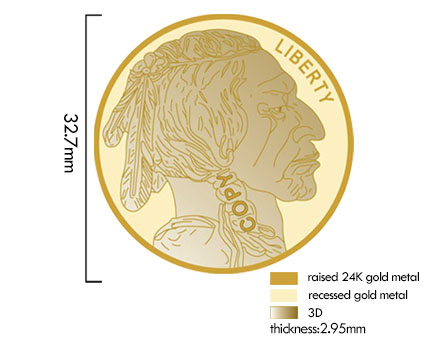
Step 3: Selecting the Right Size and Shape
Custom enamel pins come in various sizes and shapes, and your choice here significantly impacts the final product’s look and feel. Typically, lapel pins range from 0.75 inches to 2 inches.
Consider this: Smaller pins are great for subtle, elegant designs, while larger ones are perfect for more intricate details and higher visibility. If your design is complex, opt for a larger size to maintain clarity.
Step 4: Choosing Enamel Type
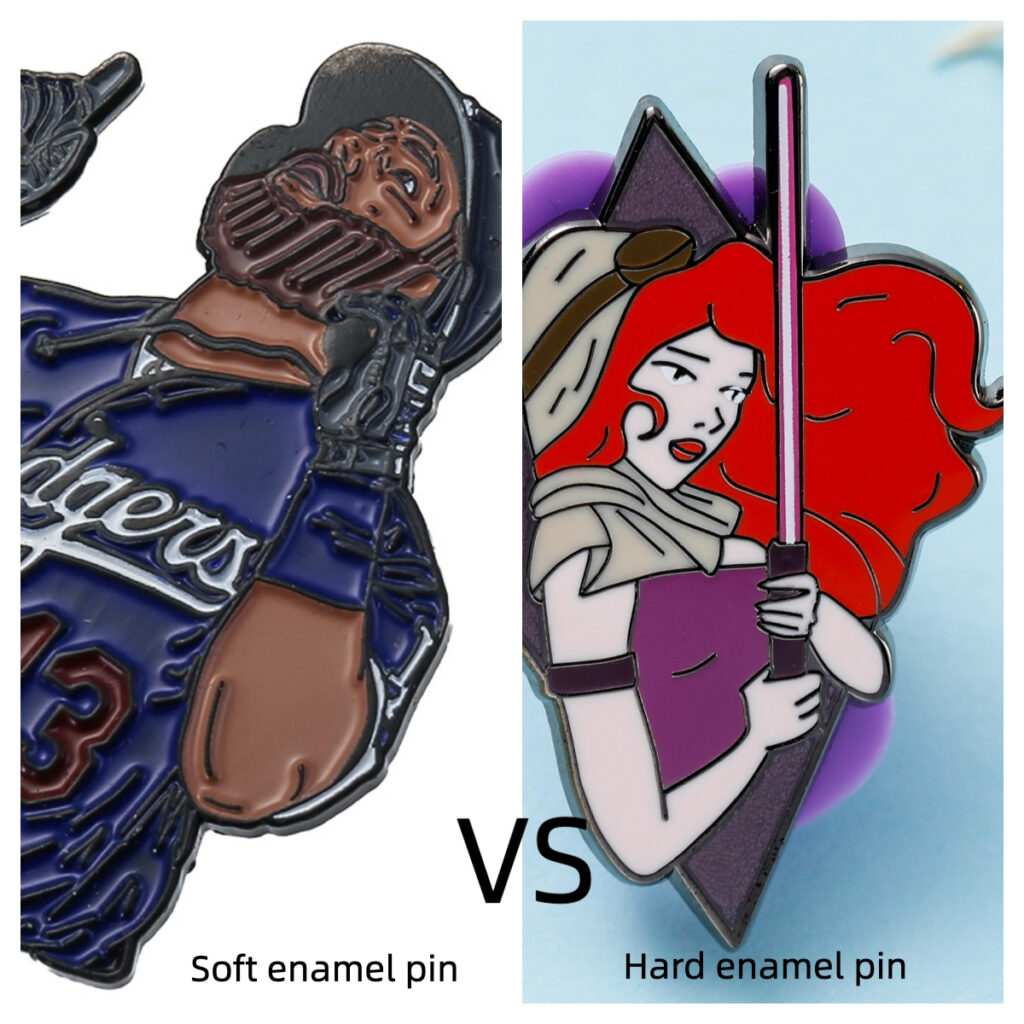
The choice between hard and soft enamel depends on the look and feel you want for your pins.
- Hard enamel is polished flat, offering a smooth and durable finish. It’s ideal for a sleek, professional appearance.
- Soft enamel, on the other hand, has recessed areas, adding texture and making colors pop, giving the design a more tactile feel.
Advanced Tip: Consider using special effects to elevate your design. For example, add a layer of transparent enamel to create depth or apply sandblasting to highlight specific areas. UV printing can also be a cost-effective way to reproduce detailed images with perfect clarity, while diamond dust can make certain areas of your pin shimmer under sunlight, offering a more premium feel than traditional glitter.
Step 5: Determining Colors and Plating
Colors and plating can make or break the aesthetic of your pin. Choosing the right colors using the Pantone Matching System is crucial to achieving the desired outcome. Next, select the metal plating that best complements your design:
- Gold adds a touch of luxury.
- Silver is versatile and complements almost any color.
- Black nickel offers a modern, sleek finish.
Expert Advice: Don’t just stop at one plating type—mixing metals can create a unique contrast that makes your pins stand out.
Step 6: Getting a Prototype
Before you commit to mass production, always request a prototype. This allows you to see and feel the final product and make any necessary adjustments. A reputable manufacturer will provide a high-quality prototype that reflects the accuracy and detail of your design.
Remember: The prototype stage is your last chance to catch any issues before production begins. Pay close attention to details like color matching, enamel fill, and the smoothness of the plating.

Step 7: Production
Once you approve the prototype, the manufacturer will begin the production process. This involves several steps, including creating a mold of your design, stamping the metal, adding enamel, and finally, attaching the pin backing.
Production Insight: Stay in close communication with your manufacturer throughout the process. Ensure they understand your expectations and are committed to maintaining quality at every stage.
Step 8: Quality Control
After production, a thorough quality control check is essential. This involves inspecting each pin for defects, such as color mismatches, plating issues, or imperfections in the enamel.
Quality Tip: Develop a checklist to ensure that every aspect of the pin—color accuracy, metal finish, and attachment security—meets your standards before shipping.
Step 9: Packaging and Presentation
Packaging plays a critical role in how your enamel pins are perceived. Thoughtful packaging can elevate the product’s value and appeal. Options include custom backing cards, branded packaging, or even eco-friendly materials to align with sustainability values.
Presentation Tip: Include a small insert with a story or message about the pin or your brand. This adds a personal touch that can resonate with customers and encourage them to share their experience.
Step 10: Marketing and Selling Your Pins
With your pins ready, it’s time to hit the market. Utilize social media platforms, your website, and even local craft fairs to showcase your pins. High-quality images are crucial here—consider hiring a professional photographer or investing in a good camera to capture your pins in the best light.
Marketing Strategy: Storytelling can significantly enhance the appeal of your pins. Share the inspiration behind the design, the process of creation, and any unique features that set your pins apart from the competition. Engage with your audience through polls, giveaways, or even behind-the-scenes content to build a loyal community around your brand.
Visualizing Your Success
To better visualize these steps, here’s an example table that summarizes the key elements in the enamel pin creation process:
| Step | Detail | Considerations |
| 1 | Idea | Clear concept and purpose |
| 2 | Design | Bold lines, vibrant colors |
| 3 | Size/Shape | Budget, visibility, detail |
| 4 | Enamel Type | Hard for durability or soft for texture |
| 5 | Colors/Plating | Pantone system, suitable plating |
| 6 | Prototype | Sample check for quality |
| 7 | Production | Stamping, enameling, backing |
| 8 | Quality Control | Check for defects, color accuracy |
| 9 | Packaging | Custom backings, branding |
| 10 | Marketing | Social media, e-commerce |
Conclusion: Bringing It All Together
By following these ten steps, you’re well on your way to creating custom enamel pins that not only look fantastic but also serve as a vibrant part of your brand or event’s identity. Remember, the journey from idea to finished product is as much about creativity as it is about precision. At Blythepin, we specialize in helping creators like you turn your ideas into high-quality, custom enamel pins. With our extensive experience, strict quality control, and a variety of special effects options, we ensure your pins will be nothing short of exceptional.
Start your custom pin journey with us today, and let’s create something extraordinary together!
- Create Custom Lapel Pins with Our Lapel Pin Maker
- Best Custom Pins Online: Quality Design & Fast Delivery
- The Ultimate Guide to Custom Metal Badges (2025): How to Create Standout Designs with China’s Top Manufacturer
- How to Wear Pins? Find the Perfect Style and Placement for You
- 5 Must-Consider Elements for Designing Stunning Custom Coins