Ever wondered why some enamel pins just look and feel better than others? If you’ve ever been frustrated by pins that scratch easily, don’t hold up over time, or have colors that just don’t pop, it’s probably because of how they were made. In this post, we’ll break down every key step in the production of enamel pins, showing you exactly what goes into making a high-quality pin versus a subpar one. Our goal? To show you why the difference is in the details and how we at Blythepin ensure every enamel pin meets the highest standards of quality.
1. Make the Mold – The Foundation of Your Pin
The creation of an enamel pin starts with the mold. A mold is a custom die created based on your design, which serves as the master blueprint for the entire production. This mold captures all the intricate details of the design, from fine lines to specific shapes. High-quality mold making is what gives a pin its clear, crisp definition—making a flower petal look like a petal, not a blob.
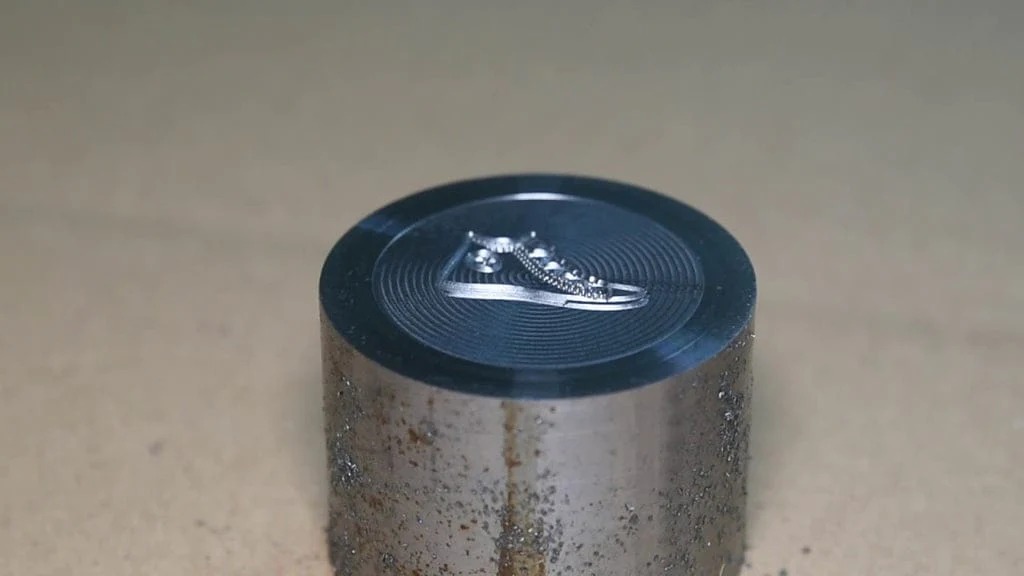
- What This Means for You: A precise mold is what gives the enamel pin its intricate and accurate detail. Cheaper pins may cut corners here, leading to blurry designs that don’t match the original artwork.For complex designs with tiny text or intricate logos, the mold-making process can be particularly challenging.he difference between a generic pin and a truly memorable one often lies in the quality of the mold—it’s the first step that defines the pin’s character.
2. Stamp the Design and Cut – Forming the Pin’s Structure
Next comes the stamping and cutting phase. In this step, the mold is used to stamp the design onto a base metal sheet, typically made of brass, iron, or zinc. The metal sheet is then cut to shape, ensuring that each pin is precisely the right size.
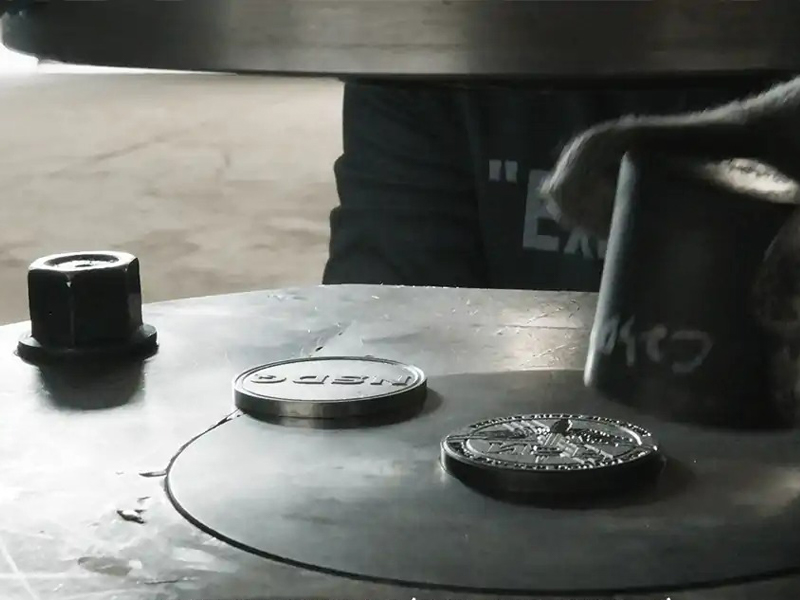
- Soft vs. Hard Enamel Difference: It’s at this stage that the choice between soft and hard enamel begins to impact production. Soft enamel pins are generally stamped with slightly more shallow recessed areas compared to hard enamel. This affects how the enamel will later sit within the pin, impacting the final look. The depth of the recessed areas in soft enamel allows the enamel to sit below the raised lines, giving the pin a more tactile, embossed effect.
- Why It Matters: High-quality stamping ensures that every line and edge of your pin is sharp and distinct. Pins with poor-quality stamping can look fuzzy or have inconsistent borders, which drastically reduces visual appeal.
- Cutting the Pin Outline: After stamping, the pins are cut out from the metal sheet using a CNC machine or laser. Precision cutting is crucial, especially for custom shapes, which require careful attention to detail to prevent any jagged edges.
3. Electroplating – Adding That Professional Shine
Once the pin is stamped and cut, it’s time for electroplating. This step involves coating the pin with a layer of metal, such as gold, silver, or black nickel, which adds both color and protection. Plating not only enhances the visual appeal of the pin but also provides a corrosion-resistant layer to keep it looking new for years.
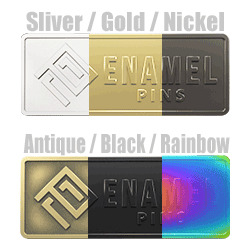
- Different Plating Options: The plating process allows for a variety of finishes—from shiny gold and silver to antique or matte looks. These plating options can significantly impact the overall feel of the pin. A shiny gold finish, for example, gives a premium, luxurious look, perfect for commemorative pins or high-end branding. On the other hand, black nickel plating offers a sleek, modern aesthetic, which works well for darker themes or artistic designs.
- Soft Enamel Pins vs. Hard Enamel Pins: The electroplating process remains the same regardless of whether the pin is soft or hard enamel. However, the choice of plating can give very different aesthetic outcomes. Gold-plated soft enamel gives a vintage, textured appearance, while hard enamel with silver plating results in a sleek, jewelry-like finish.
- Cost Implications: The type and quality of plating are major contributors to the cost of a pin. High-quality plating lasts longer and gives the pin a luxurious feel, while cheaper plating can tarnish quickly, resulting in a dull, less professional appearance.
4. Enamel and Bake – Bringing the Pin to Life with Color
Now that the pin has been plated, it’s time for the enameling process. This is where the pins receive their vibrant colors.

- Soft Enamel: Soft enamel is added by pouring liquid enamel into the recessed areas of the pin, allowing the metal edges to remain raised. After the enamel is applied, the pin is baked to harden the colors. The raised metal lines give the pin a distinct look and make the colors appear more vivid, as each area is separated by the shiny metal.
- Hard Enamel: Hard enamel, on the other hand, is applied layer by layer until all recessed areas are level with the raised metal edges. This means that after filling, the pin must be polished multiple times to achieve a smooth surface. The extra steps of polishing and baking give hard enamel pins their glossy, luxurious appearance.
- Why This Step Defines Quality: Baking is essential in both processes—it not only hardens the enamel but also helps it adhere properly to the metal base. Inferior manufacturers may skip or shorten baking times, leading to enamel that chips or wears away over time.Additionally, for hard enamel pins, multiple rounds of baking and polishing are necessary to ensure that the surface is perfectly smooth and the colors are well-integrated.Coloring a pin requires a steady hand and a lot of patience, especially when dealing with multiple colors in a small design. Each color must be added separately and allowed to set before the next is added, ensuring there is no bleeding or mixing of colors. Consistency in color application is key, and this requires both skill and attention to detail.
5. Adding Attachments – Back Stamps and Pin Backs
Once the pin has been colored and baked, the next step is adding the attachments. This involves soldering or adhering the appropriate pin backs—whether that’s a butterfly clutch, rubber clutch, or even a magnetic backing. Additionally, many high-quality manufacturers add a back stamp, which is a small mark on the back of the pin indicating the brand or providing a custom message.
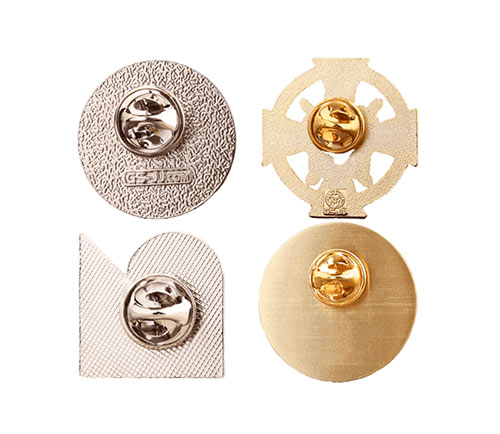
- Why This Matters: The quality of the attachment can drastically affect how secure the pin feels when worn. A poorly attached pin back could mean a lost pin. At Blythepin, we ensure that our pin backs are not only securely affixed but also comfortable and durable.
Conclusion: Why Blythepin is Your Go-To Manufacturer for Quality Enamel Pins
The key to a high-quality enamel pin lies in meticulous attention to every production step, from mold creation to the final attachment. Each process—whether it’s precise die stamping, superior plating, or careful enamel filling—plays a role in producing a pin that stands out in both appearance and durability.
At Blythepin, we combine over 20 years of craftsmanship with state-of-the-art technology to create enamel pins that exceed expectations. We don’t just make pins; we craft miniature works of art that reflect the quality and care you put into your brand. Whether you’re looking for soft enamel with its textured charm or the sleek elegance of hard enamel, our expertise ensures your pins come out exactly as you envision—vivid, precise, and made to last.
Ready to create a custom enamel pin that tells your story? Contact Blythepin today, and let us help you turn your vision into reality with craftsmanship that truly stands out.