Enamel pins are the perfect blend of art and accessory. Whether you’re a seasoned designer or just dipping your toes into the pin-making pool, creating enamel pins is a fantastic way to express your creativity. But where do you start? How do you make sure your designs aren’t just good but great? Here are the top 8 tips for designing enamel pins that will help you craft pieces people will love and cherish. Buckle up, and let’s dive into the world of enamel pin design!
1. Start with a Strong Concept
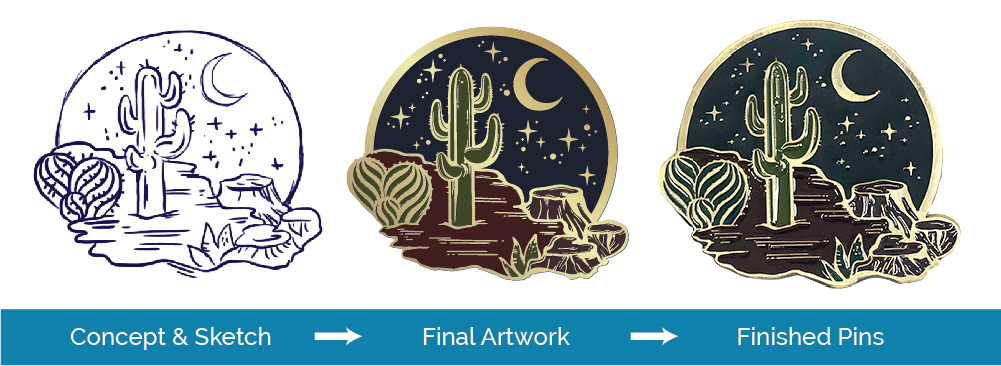
Your enamel pin design journey begins with a solid concept. What message do you want to convey? What emotions do you want to evoke? Start by sketching out your ideas on paper or using a digital drawing tool. A strong concept is the backbone of any successful design.
Source:https://www.stadriemblems.com/blog/guide-creating-your-first-enamel-pin/
- Brainstorm Ideas: Jot down everything that comes to mind.
- Create Mood Boards: Collect images, colors, and styles that inspire you.
- Think About Your Audience: Who are you designing for? What do they like?
2. Choose the Right Colors
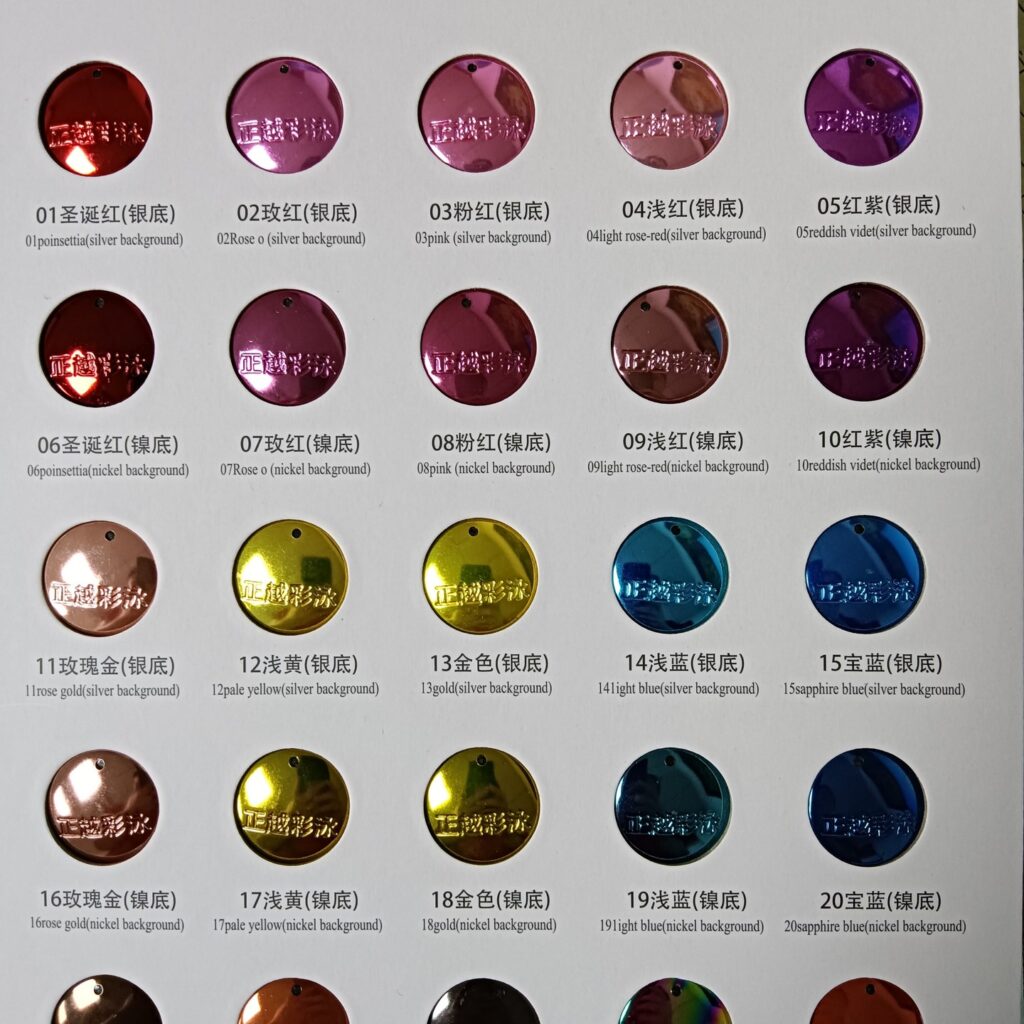
Color selection can make or break your enamel pin design. Enamel pins often rely on a limited color palette, so it’s essential to choose colors that complement each other and enhance your design.
- Stick to a Theme: Whether it’s pastel, neon, or earthy tones, make sure your colors fit together.
- Use Color Theory: Understand the basics of complementary and analogous colors.
- Test Your Colors: Mock up your design with different color schemes to see what works best.
3. Pay Attention to Size and Proportion
The size and proportion of your design elements play a crucial role in the final product. Too much detail can get lost on a small pin, while too little can make it look bland.
- Keep It Simple: Focus on essential details.
- Scale Your Design: Ensure that all elements are proportionate to the overall size.
- Consider the Pin’s Purpose: Is it a statement piece or a subtle accessory?
Source:https://www.thepinpeople.com/blog/the-basics/lapel-pin-sizes-how-to-measure-a-lapel-pin/
4. Add Texture and Depth
Adding texture and depth to your enamel pin can elevate it from good to great. Use different techniques to create a multi-dimensional look.
- Use Different Enamel Types: Soft enamel gives a textured feel, while hard enamel offers a smooth finish.
- Incorporate 3D Elements: Add layers or use raised metal to create depth.
- Play with Shadows and Highlights: Simulate texture and dimension in your design.

Source:https://www.behance.net/gallery/51300245/Enamel-pin-photoshop-actions-layer-styles-tutorials
5. Think About the Backing
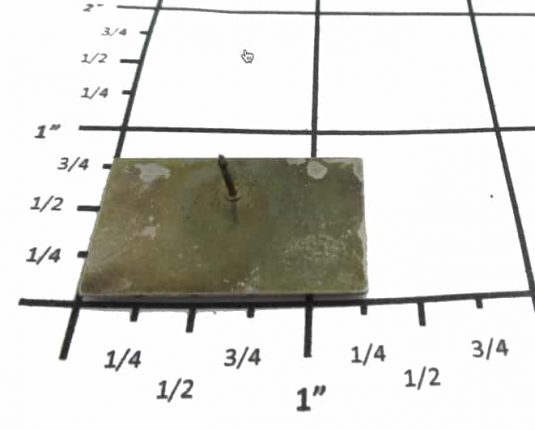
The pin backing is just as important as the front. It determines how your pin will be worn and how securely it stays in place.
- Choose the Right Clasp: Rubber, metal, or deluxe clasps each have their pros and cons.
- Consider Double Pinbacks: For larger or heavier pins, double pinbacks offer extra security.
- Design the Backing Card: A well-designed backing card can enhance the presentation of your pin.

Source:https://www.enamelpins.com/blog/10-locking-pin-backs-help-to-keep-your-pins-secure/
6. Add Special Effects
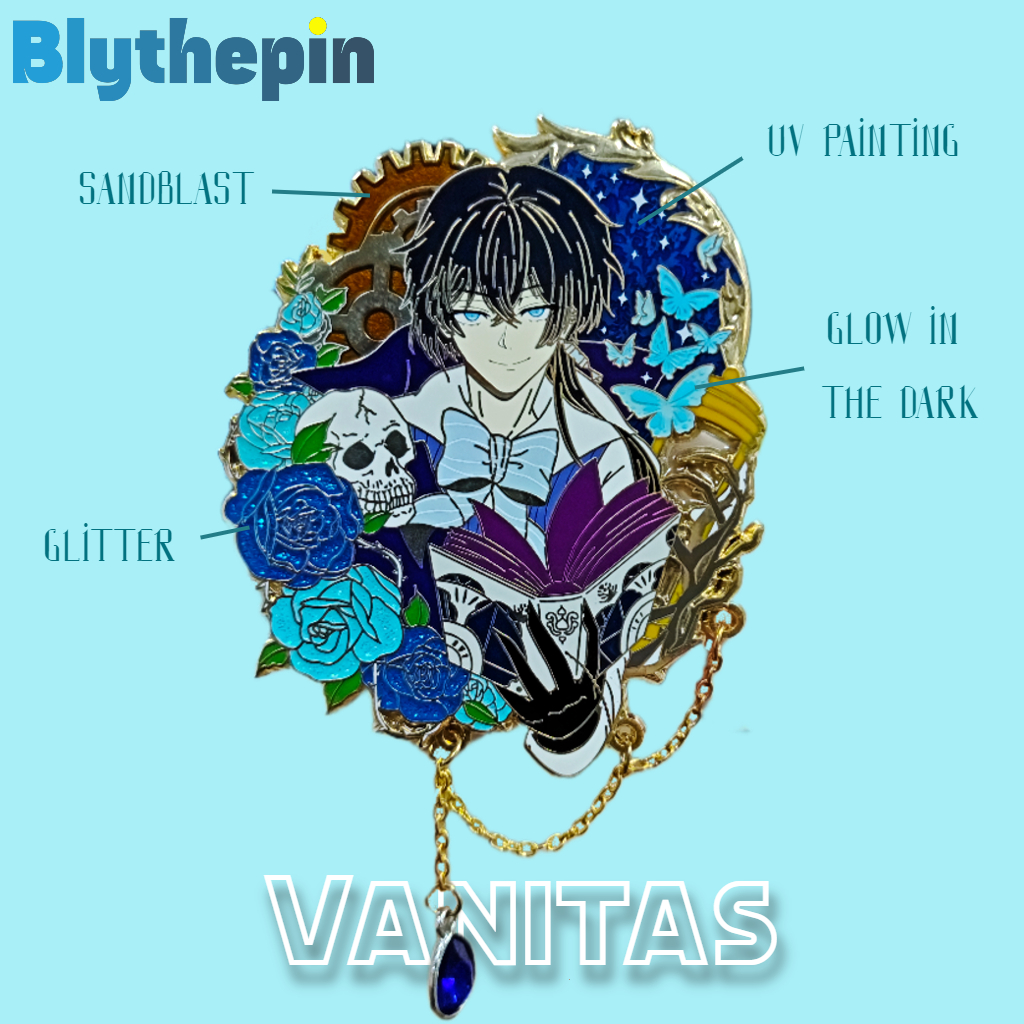
Special effects can make your enamel pin stand out and become a collector’s item. Don’t be afraid to experiment with different techniques.
- Glitter Enamel: Adds sparkle and makes your pin eye-catching.
- Glow in the Dark: Fun and functional, perfect for night events.
- Translucent Enamel: Creates a stained glass effect that’s visually stunning.
7. Focus on Quality
High-quality materials and craftsmanship are vital for a successful enamel pin design. Don’t skimp on quality if you want your pins to stand the test of time.
- Choose Reputable Manufacturers: Look for manufacturers with good reviews and a portfolio of high-quality work.
- Inspect Samples: Always check samples before mass production.
- Invest in Good Materials: Quality metal, enamel, and plating will make a big difference.
8. Market Your Pins
Once you’ve designed and produced your enamel pins, it’s time to get them into the hands of customers. Effective marketing strategies can help you reach a wider audience.
- Create a Brand: Develop a unique brand identity that reflects your style.
- Use Social Media: Platforms like Instagram and Pinterest are great for showcasing your designs.
- Attend Craft Fairs and Markets: Get face-to-face feedback and make direct sales.
FAQs
Q: How do I choose the right manufacturer for my enamel pins?
A: Look for manufacturers with experience, positive reviews, and a portfolio that showcases high-quality work. Don’t hesitate to request samples to ensure their craftsmanship meets your standards.
Q: Can I use any colors in my enamel pin design?
A: While you can use any colors, it’s best to stick to a limited palette that complements your design. Use color theory to choose colors that work well together and enhance your pin.
Q: What are the differences between soft and hard enamel?
A: Soft enamel pins have a textured surface with raised metal lines, while hard enamel pins are polished to a smooth finish. Soft enamel is great for adding depth and texture, while hard enamel offers a sleek, high-quality look.
Conclusion
Designing enamel pins is an exciting and rewarding creative endeavor. By following these top 8 tips for designing enamel pins, you’ll be well on your way to creating pins that are not only beautiful but also beloved by those who wear them. Remember, the key to a successful design is a strong concept, the right colors, and attention to detail. So go ahead, unleash your inner artist, and start designing enamel pins that will make a lasting impression!